How to run Ionic on real devices

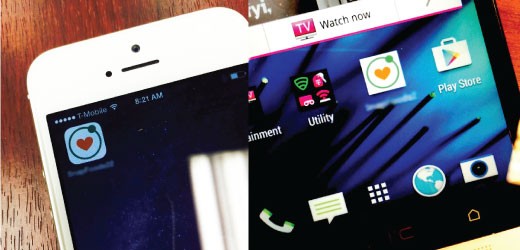
The iOS simulator and Genymotion are good and all, but there are cases where we want to run our apps on real devices. Running on devices definitely gives a different feel. This tutorial will show you how to run Ionic on real devices via the terminal.
For this tutorial, I’m using iPhone 5S running on the iOS8 and HTC One running on Android 4.4.3.
Plug in your devices
This should be an obvious step. But sometimes one can forget. (=^x^=)

Close or Quit any Genymotion or AVD’s.
We have to close any Android virtual device because the Android SDK recognizes them as real devices. For instance, if we tried to run the project, the virtual device might take precedence over the connected Android device, and the project would get installed onto the virtual device instead. This step is just to be safe, but it’s up to you.
Go to your Ionic app directory
$ cd MyIonicApps/IonicProjectMake sure you’ve configured platforms
If you haven’t:
$ ionic platform add ios
$ ionic platform add android
Build first
$ ionic build ios && androidYou must save your changes and build for each platform so that when you run your project on real devices, the changes will be reflected.
Get an iOS Provisioning Profile
This is necessary to run on any iOS device. Just go to Apple’s developer portal and create a developer provisioning profile.
Let’s Run it!
iOS
By this time, you must have an iOS Provisioning Profile and make sure that it’s recognized by Xcode. Ready?!
-
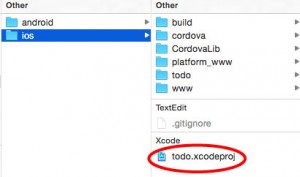
In your project directory, go to platforms > ios and you should see the Xcode file. Double click that Xcode file and wait for Xcode to load your project!

-
Back to the terminal, type
cordova prepare -
Go to Xcode and update the Bundle identifier to match the one you used from your iOS App ID Hit save (command+S).

-
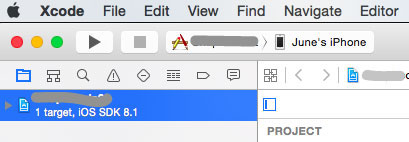
On Xcode, look at the top right corner. Choose your device and click Run.

Android
Have your Android phone turn on Developer Options. Some old phones have them on by default. But (I think) from Android 4.0 and above, the Developer Options are turned off. Once you turn them on, enable USB debugging.
To turn Android Developer Options on your phone:
- Go to your phone’s Settings app > About > find a Build Version.
- Tap the Build Version 7 times.
- Go back to the home view of the Settings app. Developer Options should be in the list. Usually it’s near the About option or next to it.
- Tap the Developer Option. Scroll down to find USB Debugging and check it.
Go back to the terminal and type the code below to run for Android. Then just eyeball the Android device. It shouldn’t take long for the app to install and start up. You can also look at the terminal for statuses.
$ ionic run androidYour Ionic app should be running on real devices now, for both iOS and Android.