How to setup BabelJS to use ES6 on your NodeJS app
Setting up ES6 on your NodeJS app has never been easier! Using ES6, also known as ECMAScript 2015, you can use syntax features such as import and export that make your Developer life easier.
As of 2020, the ES6 setup for me is a lot faster. Back then, it was so intimidating because there were so many steps and Babel modules. But lately, you pretty much just need 4 Babel modules, a package.json file and Nodemon.
Disclaimer: This is not the only way to setup ES6. But I find this one to be easier and faster for me to get started!
Make a NodeJS app
Let’s start by making a super simple and small NodeJS app. For this example, this app will be some type of REST API. So, we’ll be using Express and Cors for the essentials.
1. Make the Project Folder
mkdir small_api_es6 && cd small_api_es6
2. Make the Server Folder
All the development files will be in this server folder.
mkdir server
This might seem strange like it’s an extra step. But having this folder for all the development files, Babel will be able to generate a build folder containing files for production. Also, Babel cannot generate build files successfully if the development files are not in their own folder.
Sidenote: This can be a good file structure; Having a folder for all development files, a build folder for generated files ready for production, and a test folder for some unit testings.
3. Create the package.json file
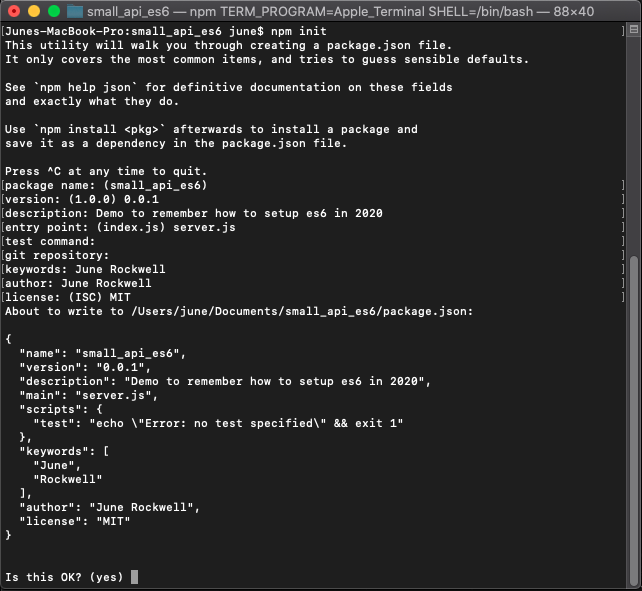
npm init
The command npm init will prompt you with the usual questions for creating a package.json file.
Install the Essential Modules
As stated earlier, this will be a small app. To create Node REST API, ExpressJS is one of the popular modules to use. But there are some well maintained modules out there like RestifyJS and FastifyJS. I usually use RestifyJS as long as I don’t need to serve HTML files. Lastly, we have to remember to setup some basic CORS. And, we can conveniently do that using the Cors module.
npm install --save express cors
Create the Entry File
Inside the server folder, create a server.js file.
import express from "express";
import cors from "cors";

const app = express();
// Allow CORS
app.use(cors());

/* Routes */
app.get('/', (req, res) => {
   res.send('Hi!');
});

app.listen(4000, () => {
   console.log("listening at 4000");
});
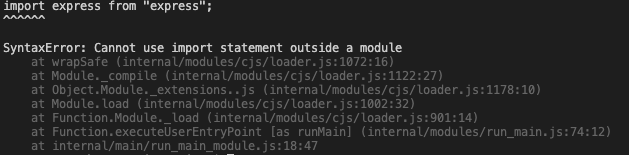
And if we run the code (type the command node server), the app won’t run because of a syntax error.
Install BabelJS Modules
We need to setup Babel for this small API app in order to use import and many other ES6 features. Let’s install the four Babel modules.
npm install --save @babel/cli @babel/core @babel/node @babel/preset-env
Nodemon
Let’s also install Nodemon. Nodemon is a helpful utility that restarts your app automatically when file changes are detected.
npm install -g nodemon
Note: Because Nodemon has to be installed globally, make sure that you have this installed on a different server when running your API app. In other words, Nodemon is locally installed on the computer you’re developing on. But if you transfer the app to a different computer or a remote server, these machines won’t necessarily have Nodemon installed by default. You can check to see if Nodemon is installed by typing nodemon -v
Configure Package.json with Babel
Add the following to your API’s package.json file.
1. Babel Preset
"babel": {
    "presets": [
      "@babel/preset-env"
    ]
}
The "babel" should be on the same level as "name", "dependencies", "license", etc.
2. Add a Watch Script
The package.json should have "scripts" by default. Add a command to start the app with Nodemon that watches for file changes.
"scripts": {
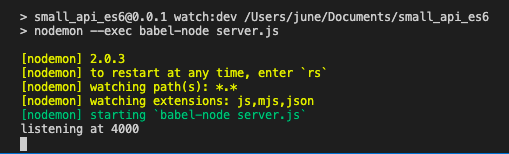
"watch:dev": "nodemon --exec babel-node server/server.js"
},
On the Terminal, type npm run watch:dev, and the API app should run.
3. Add a Build Script
You can add this before or after "watch:dev" inside the "scripts".
"build": "babel -d ./build ./server"
If you type npm run build, you should have a build folder generated for you at the root of your project folder.
4. Add a Prebuild Script
This command might come in handy.
"prebuild": "rm -rf build/*"
There might be situations where you would need to delete all the files inside the generated build folder before you generate a new one. The rm -rf is a Linux command that will remove files recursively. Or, you can just manually delete the build folder yourself.
5. Add a production Script
This command will start the app for a production environment. This means that the files to run are in the build folder, not the files in the server folder.
"start": "NODE_ENV=production node ./build/server.js"
Sidenote: This specific command might change depending on your production setup. Personally, I use Nodemon or PM2 during Development on my local machine. But I would use PM2 for Production. So this "start" script might be "start": "pm2 start ./build/server.js -i max". But PM2 and other server configurations are beyond the scope of this topic. This is just an FYI.
Extra: Add Nodemon Configurations
We might not want to watch all file changes. For example, you might not need your app to keep restarting for changes on test files. What we need is nodemonConfig.
In your package.json, add this Nodemon configuration.
"nodemonConfig": {
    "watch": [
      "server/*"
    ],
    "ignore": [
      "test/*",
      "*.test.js",
      "*.spec.js"
    ]
}
In the "watch" array, we specify the files and folders we want to watch. In the above code, we are watching for changes in the server folder. In the "ignore" array, we specify the files and folders we don’t want Nodemon to watch for changes.
Conclusion
There you have it! You can customize your "script" commands and add more as you see fit. For more information, please go to Babeljs.io