Make a simple Angular 2 SPA
This article shows the most basic way of making an Angular 2 SPA. The goal is to provide a hands-on demonstration and introduction to Angular 2 SPA in a simplistic way.
Things we’ll do
- Make a Angular 2 project.
- Make two pages.
- Make & setup the router file.
- Make a navigation component
- How to setup redirection.
Using Angular-CLI to make a project
Angular-CLI makes things easier. If you don’t have it, make sure you install it.
npm install angular-cli -g
Just like other CLI’s such as Ionic-CLI and Vue-CLI, a project will be generated for you. That project includes ready configurations, a dev server, modules to install, ready script commands, etc. You won’t have to start from scratch.
Trying to build an Angular 2 project from scratch will take a long time. The configuration is dreadful!
The project generated from Angular-CLI comes configured with Webpack and TypeScript.
Create an Angular 2 project
ng new PROJECT_NAME
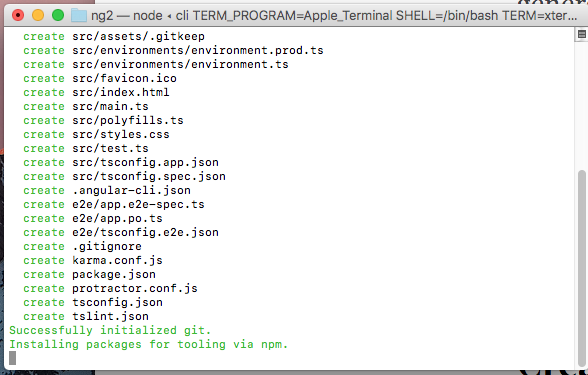
The above shows the Angular-CLI generating an Angular 2 project.
The project comes with a package.json which lists the dependecies and devDependencies. These modules need to be installed.
cd PROJECT_NAME
npm install
Installation of dependencies might take a while.
Run the app
After the dependencies have been successfully installed, you can now run the app! Below is the simple command to run the app.
ng serve
Go to the browser and type localhost:4200.
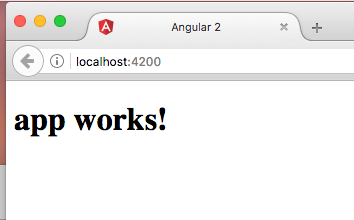
The image above shows what you should see on the browser.
The good thing about this project’s server configuration is that the browser automatically refreshes itself to reflect any changes you make.
Time to make a page
Angular 2.0 is a component based framework. This means that making a page is making a component.
For this example, we will mostly work in the app folder. It’s inside the src folder.
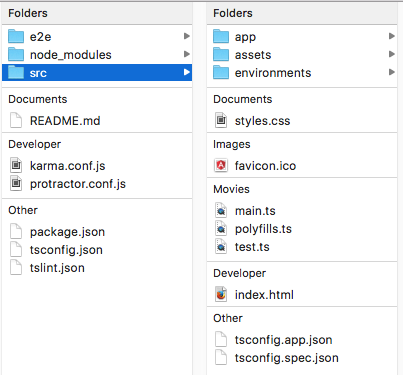
Make a pages folder.
Put the pages folder inside the app folder. For structural organization, all page components should be saved in the pages folder.
The page1.component.ts
Make a page1 folder inside the pages folder.
import { Component } from '@angular/core';

@Component({
  selector: 'page-one',
  template: `<h1>Page 1</h1>`
})
export class Page1Component {

}
To make an Angular 2 component, we import Component from the Angular 2 core. Then, we use it with the @ Decorator. As you can see,@Component() is a function. It takes in an object. The selector property is like Angular 1.x’s Directive name. The template property is for the HTML tags.
It’s not sufficient to demonstrate a SPA framework by just making one page. Let’s make a second page.
The page2.component.ts
Make a page2 folder inside the pages folder.
import { Component } from '@angular/core';

@Component({
  selector: 'page-two',
  template: `<h1>Page Two!!</h1>`
})
export class Page2Component {

}
You might be wondering why we have to make a directory for each page component. This is standard for when you want to make a module, a separate HTML, CSS files, and CSS Pre-processor files for each component.
Make the Router file
The name of the file should be app.routes.ts file. This is so that we follow the file naming convention that came with this project. Save it in the src folder.
import { ModuleWithProviders } from '@angular/core';
import { Routes, RouterModule } from '@angular/router';

/*
import Page Components
=============================================== */
import { Page1Component } from './pages/page1/page1.component';
import { Page2Component } from './pages/page2/page2.component';

export const routes: Routes = [{
  path: 'page1', component: Page1Component
}, {
  path: 'page2', component: Page2Component
}];

export const routing: ModuleWithProviders = RouterModule.forRoot(routes);
The above code shows a basic router file for an Angular 2 SPA.
The definition of the routes variable is in TypeScript; The routes variable is an instance of Routes. And, it takes in an array of objects. Each object is required to have a path and a component property. We import the page components so that we can match them to their appropriate path.
The intention is to enable access to the pages as localhost:4200/page1 or localhost:4200/page2. However if we type either one in the browser, the contents of won’t show up yet. This is because the project doesn’t know about the router file and the page components. This is why we export routing as a module at the very end of the file.
Include the page components and routing in the app.module.ts.
Importing the page components seem redundant. But we had to import the page components in the app.routes.ts file to configure the paths to these pages. And, we need to tell the app.module.ts that these pages exists. So add the page components in the declartions property of the @NgModule. Also, add routing to the imports property.
import { BrowserModule } from '@angular/platform-browser';
import { NgModule } from '@angular/core';

/* The Main Component for this SPA. */
import { AppComponent } from './app.component';
// include these somewhere above @NgModule
import { routing } from './app.routes';

/* import page components */
import { Page1Component } from './pages/page1/page1.component';
import { Page2Component } from './pages/page2/page2.component';

@NgModule({
  declarations: [
    AppComponent,
    // The page components
    Page1Component,
    Page2Component
  ],
  imports: [
    BrowserModule,
    routing
  ]
})
Before we test and see the pages appear in the browser, we have to add the <router-outlet> in the root component’s html template. This component is responsible for showing the page components that we setup in the router and included in the root module. Open the app.component.html. It should be in the app folder.
<h1> {{title}}</h1>
<div>
 <router-outlet></router-outlet>
</div>
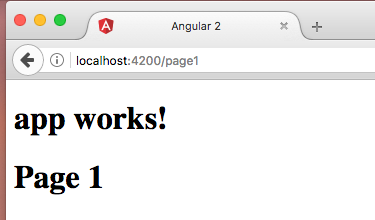
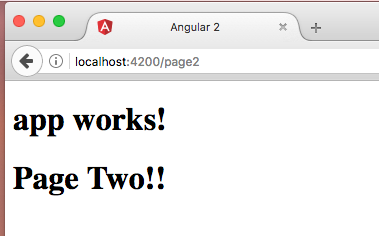
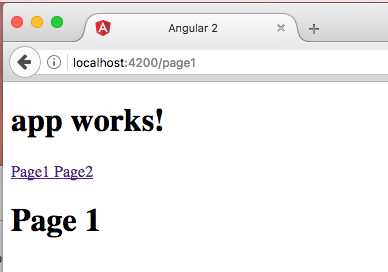
Now type in localhost:4200/page1 in the browser. You’ll see the contents of page 1. If you type localhost:4200/page2, you’ll see the contents of page 2.
If you only typed localhost:4200, the page 1 content didn’t show up. This is because we didn’t setup a default redirection in router file.
Redirection
Let’s make page 1 show up by default. Go to the app.routes.ts.
Add another object in the routes instance:
export const routes: Routes = [{
  path: 'page1', component: Page1Component
}, {
  path: 'page2', component: Page2Component
}, /* This new object is the redirection*/
{ path: '**', redirectTo: '/page1' }
];
The ** is a wildcard. So if you type localhost:4200, page 1 will show up. If you type localhost:4200/abcd, page 1 will show up because path abcd doesn’t exist. Everything redirects to page 1 except page 2 since it is defined.
Bonus: Navigation Component
Constantly typing in the browser’s address bar is not ideal. Especially, if the end users don’t know all of the paths. That’s why navigation menus exist. Let’s make a navigation component.
You can skip this part. But the real bonus part is learning how to make a component that’s not a page. This type of component should be inside the components folder in app folder. This way, we can differentiate page components and other non-page components.
Make a nav-menu folder. This folder will contain the implementations of a navigation component. Then, make a nav-menu.component.ts file.
import { Component } from '@angular/core';

@Component({
  selector: 'nav-menu',
  template: `
    <nav>
      <a [routerLink]="['/page1']">
        Page1
      </a>
      <a [routerLink]="['/page2']">
        Page2
      </a>
    </nav>
  `
})
export class NavMenuComponent { }
The template has the HTML <nav> element. And in it, there are two anchor tags <a>. Without Angular 2, we’d be using the href attribute for the anchor tags. But Angular 2’s Router provides the RouterLink directive. As you can see, we use it as property binding that takes in an array. In the end, it translates to <a href="/page1"> in the browser. So things still work. We do this so that we avoid hard coding routes. We also do this so that we can easily pass parameters:
['routePath', param1, { prop1: val1, prop2: val2 } ....]
Include the navigation in the app.module.ts.
. . .
import { NavMenuComponent } from './components/nav-menu/nav-menu.component';
. . .

@NgModule({
   declarations: [
      AppComponent,
      Page1Component,
      Page2Component,
      //Add the navigation component
      NavMenuComponent
   ]
   . . .
})
Now that the root app module knows about the NavMenuComponent, we need to add it in the html template. Open the app.component.html file and add the <nav-menu> above the <router-outlet>.
<h1>{{title}}</h1>
<div>
  <nav-menu></nav-menu>
  <router-outlet></router-outlet>
</div>
This project has been uploaded to GitHub!
Ending
Although Angular projects can get very large, this article only show the basics. Hopefully, Angular 2 won’t be intimidating anymore, and all this information clarifies how to make a SPA.
If you read this article all the way to get your feet wet with Angular 2, then I hope you’ll immerse yourself in Angular 2 even more.